

“The Frontier is bigger than one sector, Commander. So are its problems.”
— Fleet Admiral Selene Voss
Thirty sectors
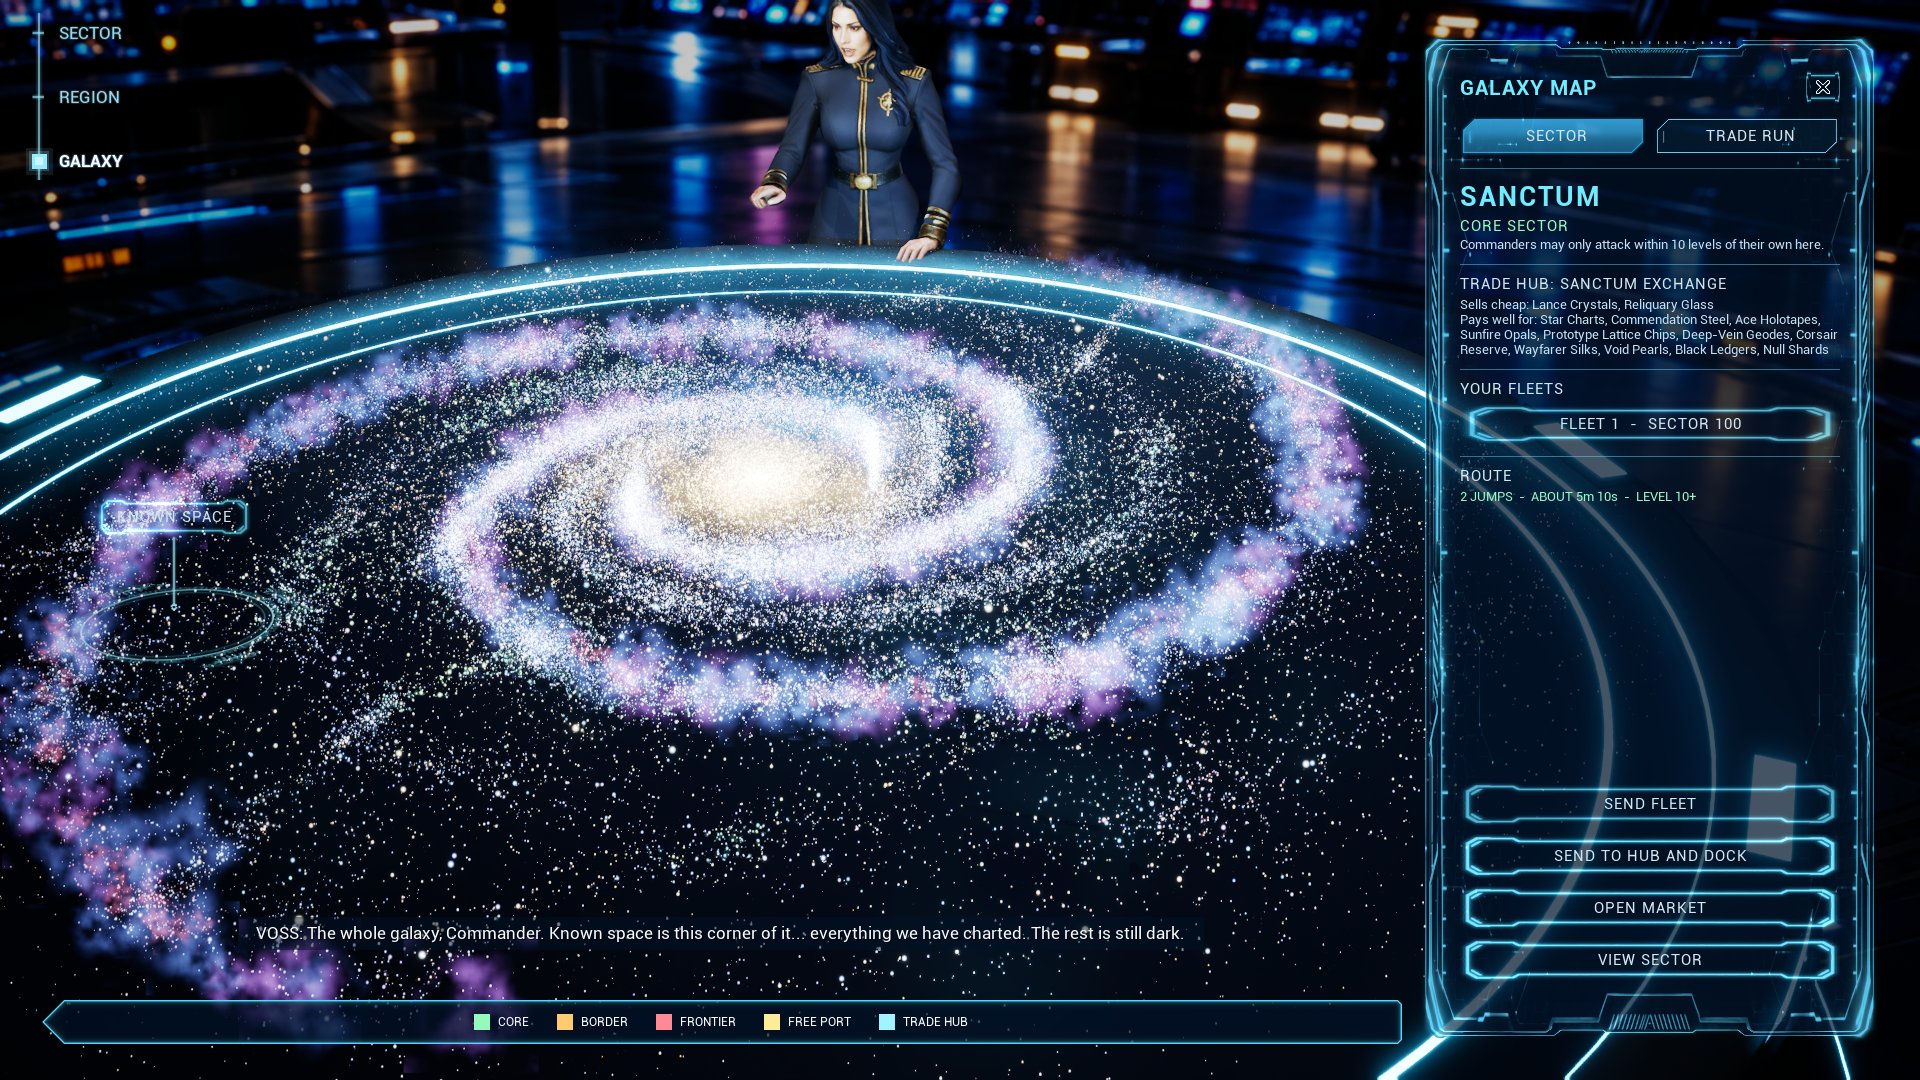
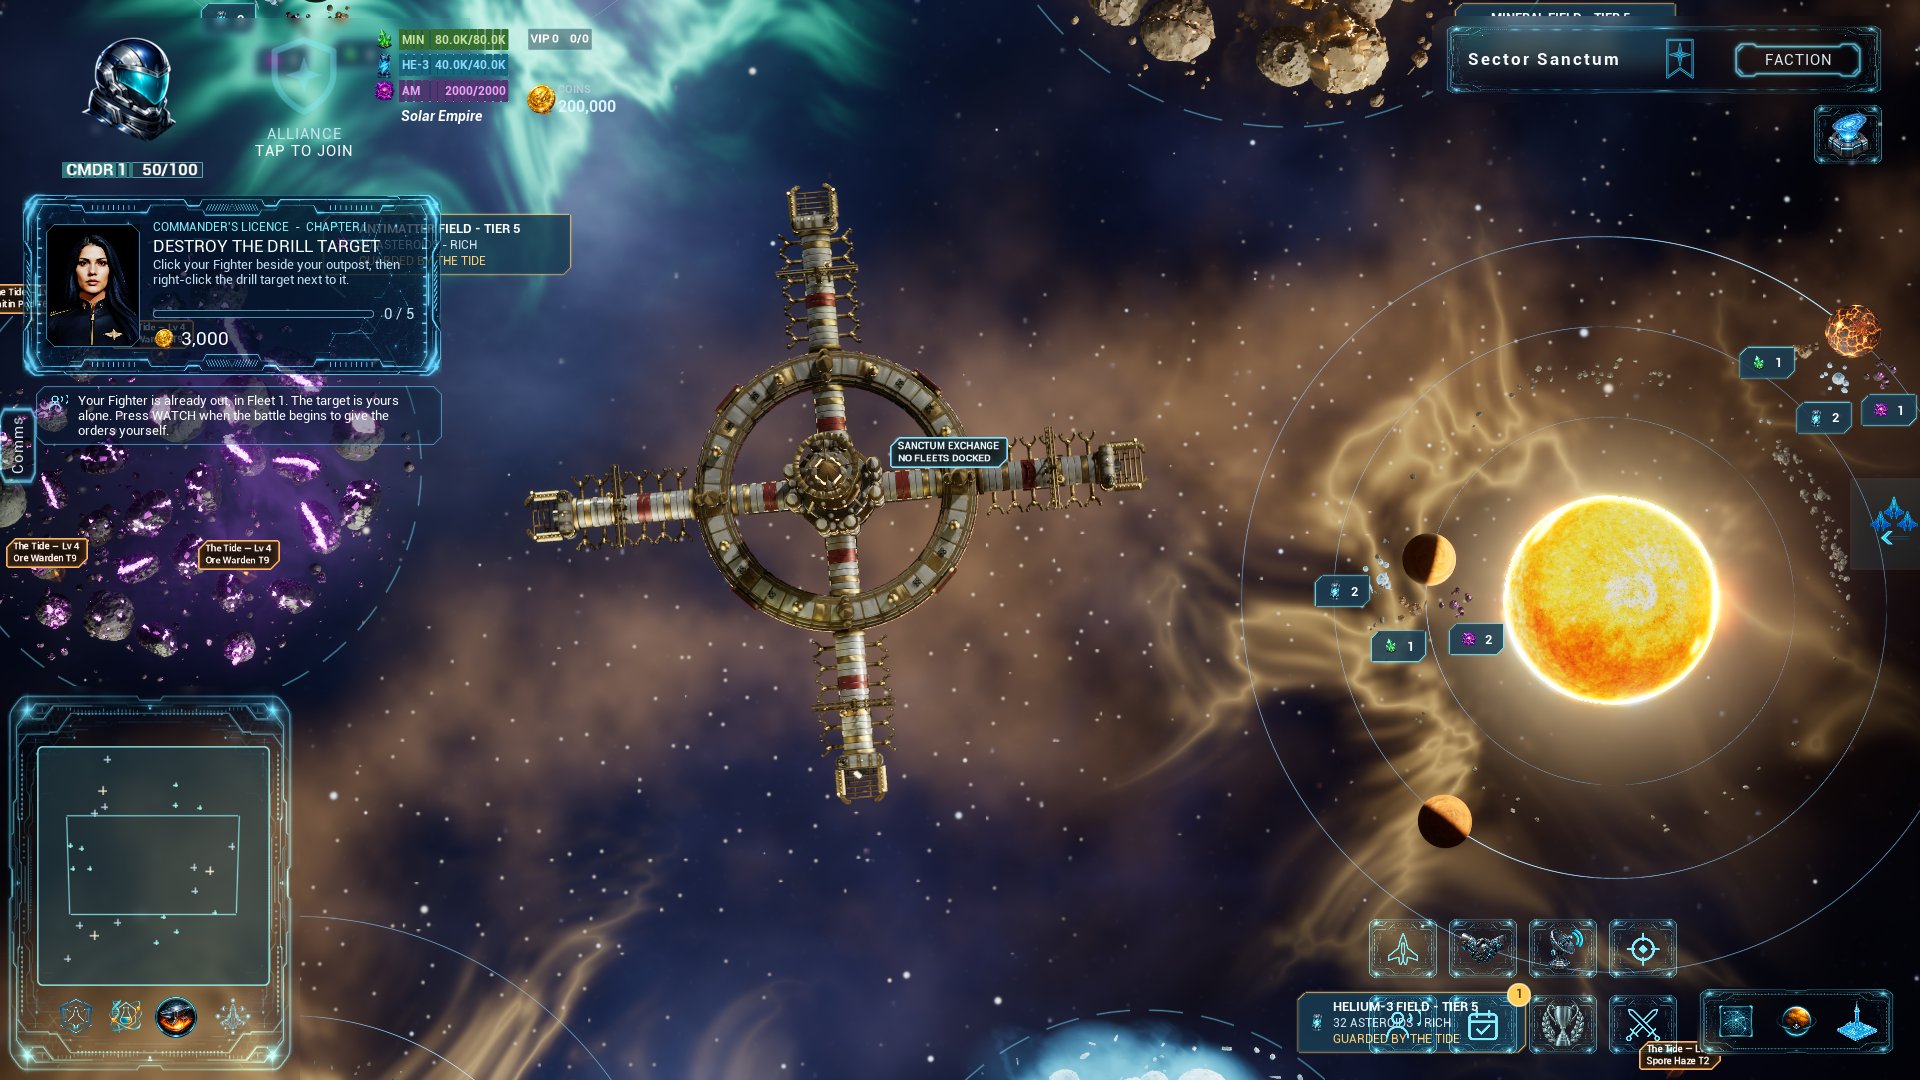
The Frontier is a galaxy of thirty sectors joined by warp lanes. Free Port sits at the centre. Around it lie Sector 100, where new commanders start, and the homes of the ten factions. Border sectors sit between neighbouring homes, and the frontier runs along the rim.
Every sector belongs to a zone, and the zone decides who may attack whom there:
| Zone | Sectors | Battles between commanders |
|---|---|---|
| Free Port | Free Port, the Freelancers' home | Nobody may attack anybody near the station. Further out, as in Sector 100 |
| Faction home | Iron Vanguard Core, Axiom, The Aurelian Ring, Sanctum, Pyre, The Caravan, The Undercroft, Horizon, The Ledger and Bedrock | Only between commanders within 10 levels of each other, up or down, anywhere in the sector. Attacking another commander's fleet here also costs you 250 standing with that faction |
| Sector 100 | Sector 100 | As before: anyone in sector space, the planet rules in a planet's view |
| Border | The eleven sectors between the homes | The same rules as Sector 100 |
| Frontier | The seven sectors on the rim | The same rules as Sector 100 |
The Tide can be attacked anywhere, and no zone shelters it. Its patrols fly in every sector beyond Sector 100: tiers 2 to 6 in the faction homes, 8 to 12 in border space and 14 to 17 on the frontier. The sectors have asteroid fields to mine, as in Sector 100, and the richest are out on the frontier. The rules everywhere else are the ones in Combat.
Where commanders live. Bases stand on planets in Sector 100 and in the ten faction homes, nine planets in each home. Free Port, the border sectors and the frontier have no planets for bases. New commanders start in Sector 100 while it has room, then in one of the faction homes. A base can move to any sector with planets: see Moving your base.
The galaxy map
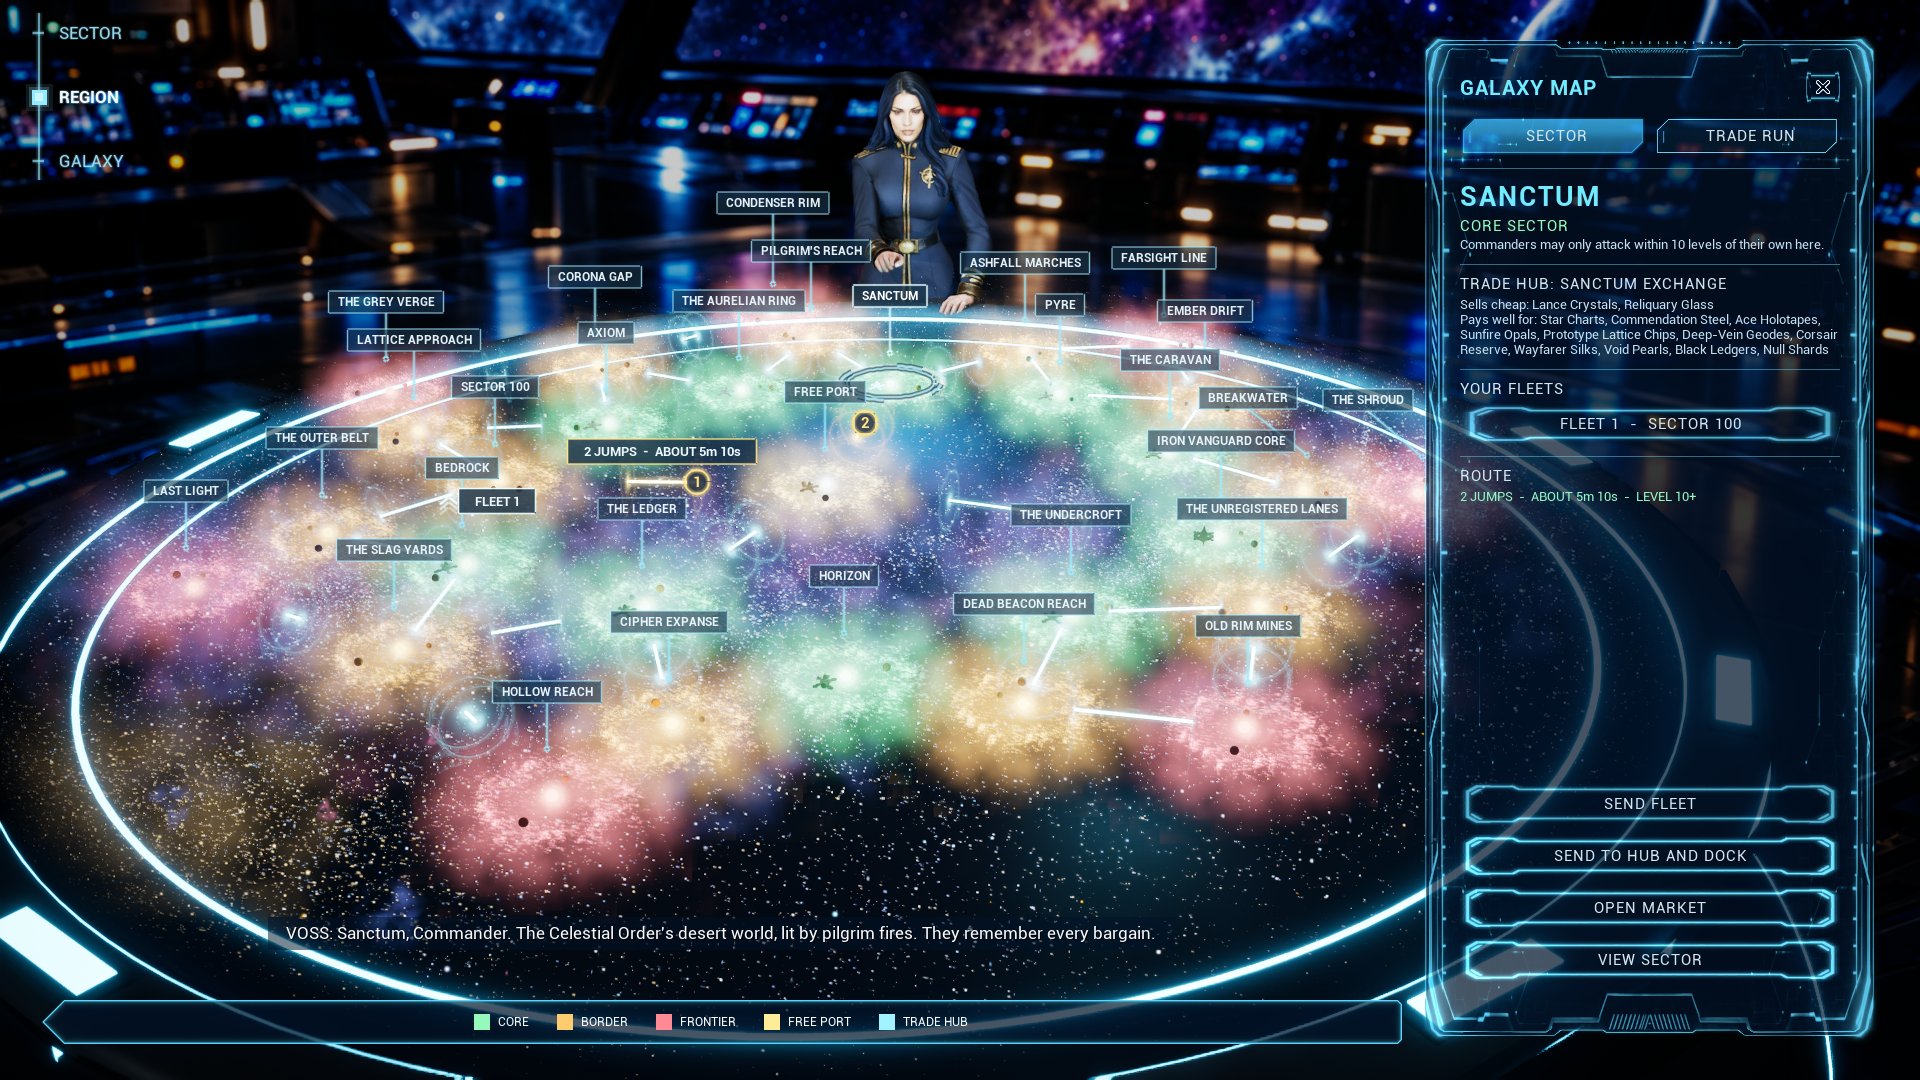
Press Galaxy Map, the holo-table icon in the row under FACTION at the top right, and Fleet Admiral Voss shows you the galaxy on the bridge's holo table. Every sector is coloured by its zone, and the trade hubs are marked.
| Input | What it does |
|---|---|
| Click a sector's name | Pick it. Voss tells you about every sector you pick |
| Mouse wheel | Turn the table |
| SECTOR, REGION, GALAXY (top left) | Zoom out, up to the whole galaxy |
| Click a gate's name plate (sector view) | Open the galaxy map on the sector behind that gate |
The panel on the right has two tabs. SECTOR names the sector you picked, its zone and its rule, its trade hub with what it sells cheap and pays well for, and the ROUTE from your fleet: the jumps, about how long they take and the level the lanes need (2 JUMPS - ABOUT 5m 10s - LEVEL 10+). Under it: YOUR FLEETS, SEND FLEET, SEND TO HUB AND DOCK, OPEN MARKET and VIEW SECTOR, which shows you that sector's map. TRADE RUN plans a run: see Trading and Hauling.
Travelling between sectors
Fleets travel between sectors through warp gates, along lanes. Only a deployed fleet can travel, and not while it is fighting. There are two ways to send one:
| Do this | And the fleet |
|---|---|
| Select a fleet and right-click a gate, or its name plate | Flies to the gate, charges its drives and jumps to the sector on the other side. The plate names the sector the gate leads to |
| On the galaxy map, pick a sector and one of YOUR FLEETS, then SEND FLEET | Takes the quickest open lanes there by itself, gate after gate. SEND TO HUB AND DOCK goes on to that sector's trade hub and docks |
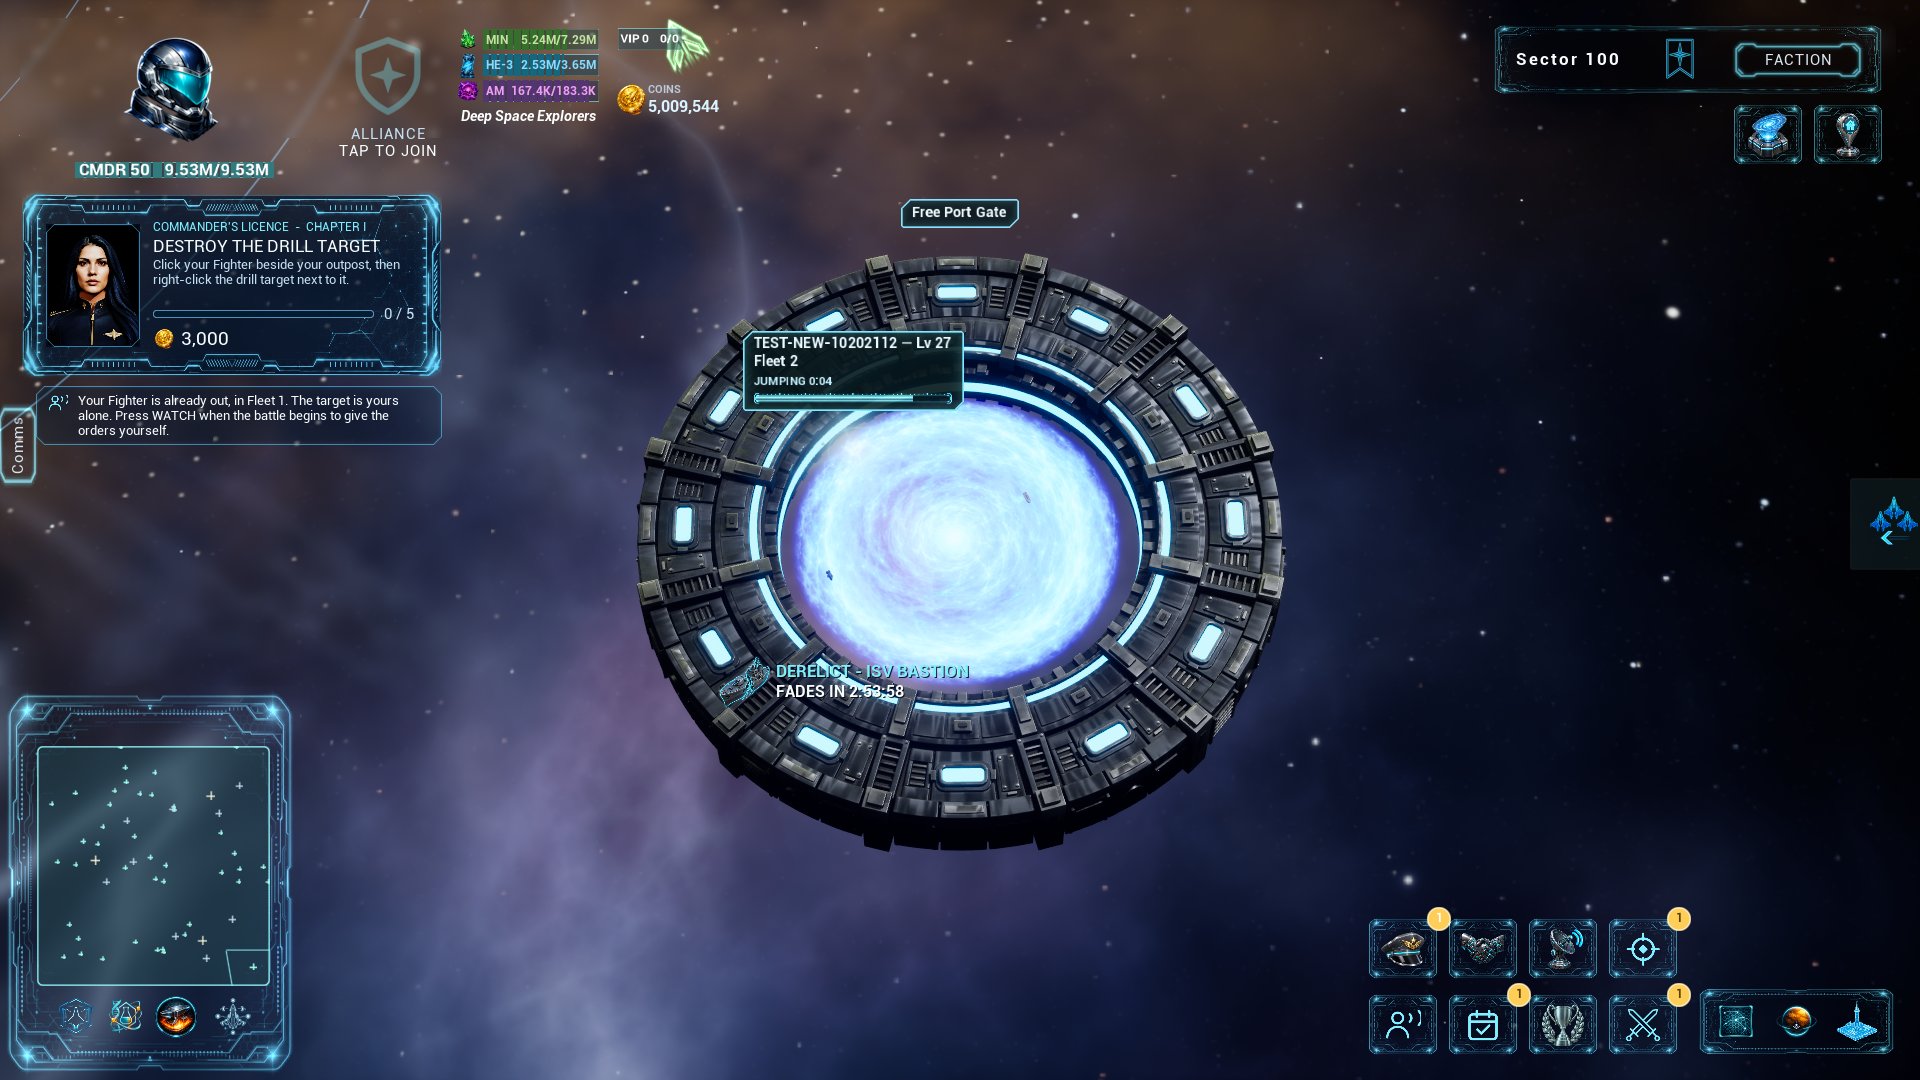
The jump. At the gate the fleet charges its drives for 20 seconds. Its plate reads SPOOLING with the time left and CAN BE CAUGHT: it sits still, everyone in the sector sees it charge, and it can be attacked. Then it jumps. It is gone from the sector map, and the galaxy map shows it moving along the lane. A lane takes 2 to 3½ minutes.
Lanes need a commander level. A gate whose lane needs a higher level than yours is dimmed and its plate reads LEVEL and the number; a closed gate reads CLOSED. The route on the galaxy map shows the highest level on the way.
| Lane | Opens at level |
|---|---|
| Sector 100 to Free Port | 5 |
| Free Port to Iron Vanguard Core, Sanctum and The Ledger | 10 |
| Sector 100 to Lattice Approach and to The Outer Belt | 10 |
| A faction home to the border sectors beside it | 15 |
| A border sector to the frontier | 30 |
So from level 5 you can reach Free Port, from level 10 three faction homes and two border sectors, and from level 15 every home and border sector.
A fleet in another sector when the server restarts comes home, like every fleet. Goods it carried go back to the hangar they were loaded from: see Trade Hubs and Docking.
Starting values. The lane times, the levels and the 20 seconds may change.